

Prepare yourself for a flavor explosion that’ll make your taste buds do the tango! Get ready to dive headfirst into the delicious world of Peach Cobbler Cheesecake Cones. These aren’t your grandma’s cobblers; these are sophisticated, portable, and utterly irresistible.
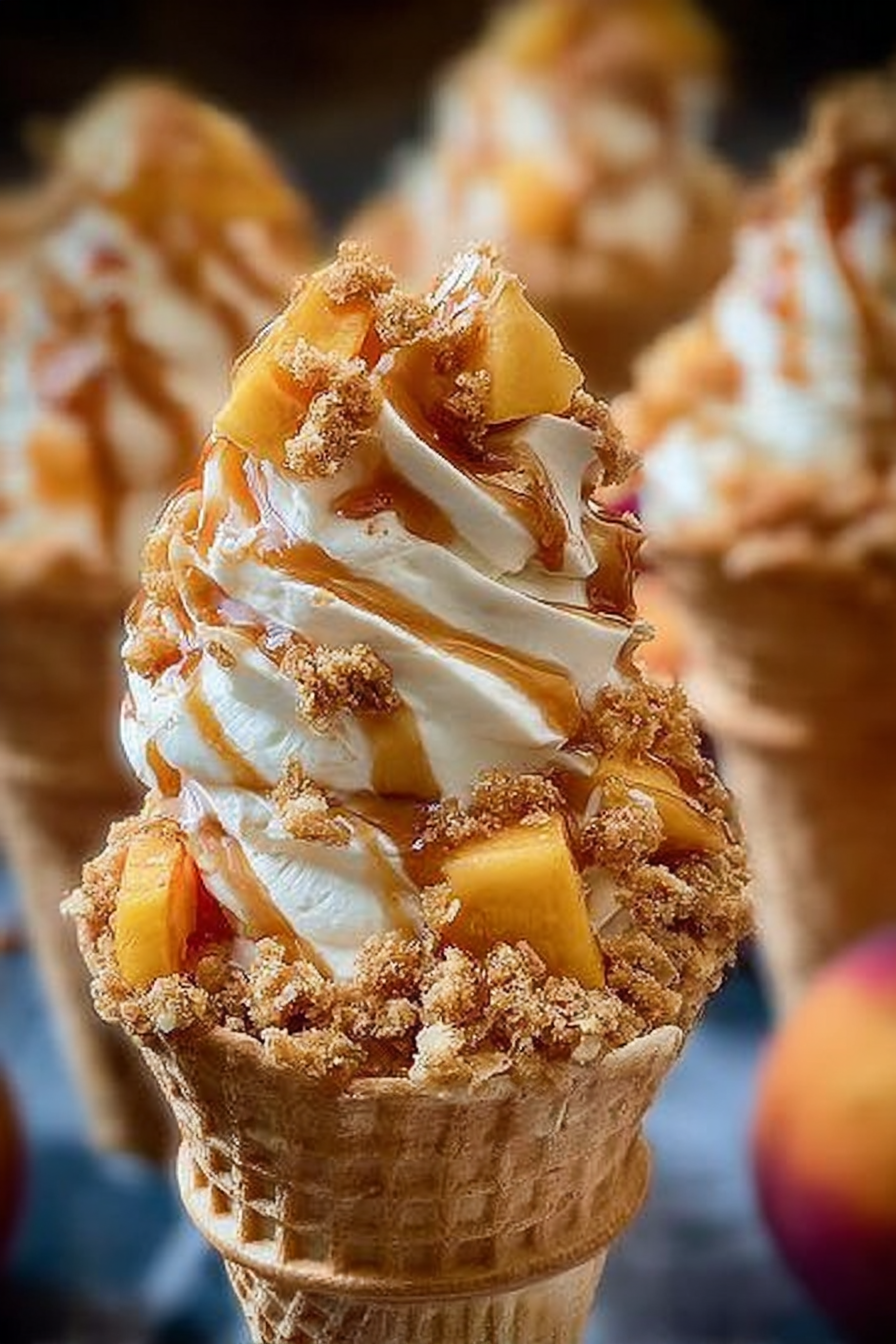
Picture this: warm, gooey peach cobbler filling nestled in a creamy cheesecake base, all cradled within a crispy, golden cone. Its sweet and tangy dance will leave you craving more, a culinary adventure perfect for any occasion.
These Peach Cobbler Cheesecake Cones boast an irresistible blend of sweet and tangy flavors. They’re incredibly easy to make, visually stunning, and adaptable to your favorite toppings. Their individual serving size makes them ideal for parties or a quick, satisfying treat. Get ready for a taste sensation!
- Effortless assembly makes these cones a breeze to prepare, perfect for even the busiest bakers.
- The harmonious blend of sweet peaches, tangy cheesecake, and warm spices creates a symphony of flavor.
- The vibrant colors and elegant presentation of these cones are guaranteed to impress your guests.
- Their individual portions make them ideal for potlucks, parties, or a delightful personal indulgence.
Ingredients for Peach Cobbler Cheesecake Cones
Here’s what you’ll need to make this delicious dish:
The full ingredients list, including measurements, is provided in the recipe card directly below.
How to Make Peach Cobbler Cheesecake Cones
Follow these simple steps to prepare this delicious dish:
Step 1: Prepare the Crust
Crush the graham crackers into fine crumbs using a food processor. Combine the crumbs with melted butter (or a vegan butter alternative) and sugar. Press this mixture into the bottom of your ice cream cones. Chill in the freezer while you make the filling.
Step 2: Make the Cheesecake Filling
In a mixing bowl, beat together the softened cream cheese, sugar, and Alcohol-free alcohol-free vanilla extract until smooth and creamy. Beat in the eggs one at a time, ensuring each one is fully incorporated before adding the next. Slowly incorporate the agar-agar powder.
Step 3: Prepare the Peach Cobbler Filling
In a separate bowl, gently combine the diced peaches, lemon juice, cornstarch, and cinnamon. Set aside.
Step 4: Assemble the Cones
Layer the peach cobbler filling evenly over the graham cracker crust in your chilled cones. Top with the cheesecake mixture.
Step 5: Bake and Chill
Bake the cones in a preheated oven at 350°F (175°C) for approximately 15-20 minutes, or until the cheesecake filling is set and lightly golden brown. Let them cool completely before chilling for at least 2 hours to allow the filling to set fully.
Step 6: Serve and Enjoy
Garnish with a dollop of whipped cream (vegan whipped cream is a fantastic alternative), a sprinkle of cinnamon, or a fresh peach slice. Serve immediately and revel in the deliciousness. Enjoy!
Perfecting the Cooking Process
First, prepare the cheesecake filling, ensuring it’s completely chilled before assembling the cones. Next, bake the peach cobbler filling until bubbly and slightly browned. Finally, assemble the Peach Cobbler Cheesecake Cones, layering the components carefully for optimal flavor and presentation.
Add Your Touch
Feel free to experiment! Swap peaches for other berries. Add a sprinkle of cinnamon or nutmeg to the cobbler. Consider using different types of nuts for added crunch. Get creative and make it your own.
Storing & Reheating
Store assembled cones in the refrigerator for up to 3 days. Reheat gently in the microwave or oven until warm, taking care not to overcook and melt the cheesecake. Enjoy!
Preheat your oven to the correct temperature; this avoids over- or under-baking.
Don’t overmix the cheesecake batter; this prevents it from becoming tough.
Use ripe, but not overripe, peaches for the best flavor and texture in your Peach Cobbler Cheesecake Cones.
My first attempt at these cones was a disaster – the cobbler topping was completely soggy. After adjusting baking time and using a slightly drier filling, success!
The Peach Cobbler Cheesecake Cone Recipe
Making the Crust
This recipe uses store-bought sugar cones for simplicity. If you are feeling ambitious, you can make your own sugar cones following a reliable recipe which is easily found online.
Preparing the Cheesecake Filling
This is where the magic happens. For the cheesecake filling, you’ll need: 8 ounces of cream cheese (softened), ¼ cup of granulated sugar, 1 teaspoon Alcohol-free alcohol-free vanilla extract, and a pinch of salt.
Combine the softened cream cheese, sugar, and salt in a bowl. Beat until smooth and creamy. Then, incorporate the Alcohol-free alcohol-free vanilla extract. The texture should be light and fluffy.
Crafting the Peach Cobbler Filling
This is the star of our show! The peach cobbler filling uses: 3 cups of fresh peaches (peeled and sliced), ¼ cup of granulated sugar, 2 tablespoons of cornstarch, 1 tablespoon of lemon juice, and ½ teaspoon of ground cinnamon.
Combine the peaches, sugar, cornstarch, lemon juice, and cinnamon in a saucepan. Cook over medium heat until the mixture thickens, stirring frequently to avoid burning. It should reach a consistency similar to a slightly thick jam. Let it cool slightly before using.
Assembling Your Peach Cobbler Cheesecake Cones
Now comes the fun part. Start by placing a layer of the chilled cheesecake filling into each sugar cone. Leave a little space at the top. Next, spoon the cooled peach cobbler filling over the cheesecake. If desired, a sprinkle of chopped pecans or almonds can be added for extra texture.
The Grand Finale
Your Peach Cobbler Cheesecake Cones are ready for their close-up. Refrigerate for at least 30 minutes before serving to allow the flavors to meld and the cheesecake to firm up nicely. These beauties are perfect for any occasion – a casual get-together, a summer picnic, or even a sophisticated dessert after dinner.
Enjoy the delightful combination of creamy cheesecake and warm, comforting peach cobbler in every single bite of this stunning dessert. The Peach Cobbler Cheesecake Cones are a testament to the magic that happens when classic flavors meet inventive presentation. This recipe will undoubtedly become a favorite for you and your loved ones.
Conclusion for Peach Cobbler Cheesecake Cones
Making these Peach Cobbler Cheesecake Cones was a culinary adventure! From the perfectly balanced sweetness of the peaches to the creamy, dreamy cheesecake filling and the irresistible crunch of the cobbler topping, each bite is pure bliss. The beauty of this recipe is its flexibility – you can adjust the sweetness and spice levels to your taste. Remember, chilling the filling is crucial for a successful outcome. So gather your ingredients, roll up your sleeves, and prepare for a delicious treat that will have everyone begging for more. These Peach Cobbler Cheesecake Cones are a surefire way to impress and delight.
Print
Peach Cobbler Cheesecake Cones
Delicious peach cobbler cheesecake cones recipe with detailed instructions and nutritional information.
- Total Time: 35 minutes
- Yield: 4 servings 1x
Ingredients
- 1 package (14.1 ounces) refrigerated sugar cookie dough
- 8 ounces cream cheese, softened
- 1/2 cup granulated sugar
- 1 large egg
- 1 teaspoon vanilla extract
- 1 cup fresh peaches, peeled and diced
- 1/4 cup peach preserves
- 1 tablespoon all-purpose flour
Instructions
- Step 1: Preheat oven to 350°F (175°C). Line a baking sheet with parchment paper. Roll out sugar cookie dough and use a 4-inch cookie cutter to cut out circles. Press each circle into the bottom and up the sides of a mini muffin tin to form a cone shape. Bake for 8-10 minutes, or until lightly golden. Let cool completely.
- Step 2: In a medium bowl, beat together cream cheese and granulated sugar until smooth and creamy. Beat in egg and vanilla extract until well combined. Gently fold in the diced peaches and peach preserves.
- Step 3: Fill each cooled sugar cookie cone about ¾ full with the cream cheese mixture.
- Step 4: Sprinkle the tops of the cheesecakes with the all-purpose flour for a subtle textural element and to prevent cracking.
- Step 5: Bake for 12-15 minutes, or until the cheesecake filling is set. Let cool completely before serving.
- Step 6: Refrigerate for at least 30 minutes before serving to allow the filling to fully set. Garnish with extra peach slices or a dusting of powdered sugar, if desired.
Notes
- Store leftover Peach Cobbler Cheesecake Cones in an airtight container in the refrigerator for up to 3 days.
- For a warm, gooey treat, gently reheat individual cones in the microwave for 15-20 seconds.
- Serve these delightful bites with a scoop of vanilla ice cream or a drizzle of caramel sauce for an extra decadent touch.
- To prevent the sugar cookie cones from becoming soggy, ensure they are completely cool before filling them with the cheesecake mixture.
- Prep Time: 15 minutes
- Cook Time: 20 minutes
- Method: Stovetop
- Cuisine: American
FAQs
Can I make these Peach Cobbler Cheesecake Cones ahead of time?
Absolutely! These delightful Peach Cobbler Cheesecake Cones are best enjoyed fresh, but you can prepare the cheesecake filling and the cobbler topping a day or two in advance. Store them separately in airtight containers in the refrigerator. Assemble the cones just before serving to maintain their crispness and prevent the cheesecake from getting soggy. A little advance planning means you can impress your guests without the last-minute kitchen scramble.
What can I substitute for the agar-agar in the Peach Cobbler Cheesecake Cones recipe?
While agar-agar gives a fantastically smooth and firm texture to the cheesecake filling, you can experiment with other plant-based gelling agents. Pectin is a good alternative, though you might need to adjust the amount based on the type you use and the recipe instructions. Carrageenan is another option, but remember to follow package instructions carefully, as its gelling properties can vary. Remember to always test your chosen substitute in a small batch before committing to the full recipe.
Are these Peach Cobbler Cheesecake Cones gluten-free?
The recipe as written doesn’t contain any gluten-containing ingredients. However, always double-check the labels of your purchased ingredients, especially the graham cracker crumbs used in the crust. Some brands might contain gluten, even unexpectedly. If you need a guaranteed gluten-free version, use certified gluten-free graham cracker crumbs. Making your own graham cracker crust from gluten-free flour is another wonderful option! Enjoy your Peach Cobbler Cheesecake Cones worry-free.
How do I prevent the Peach Cobbler Cheesecake Cones from becoming soggy?
The key to preventing sogginess is careful assembly and storage. Ensure the cheesecake filling is completely chilled and firm before adding the peach cobbler topping. Don’t overfill the cones, leaving a little space at the top. If making ahead of time, store the filling and topping separately and assemble just before serving. This way, the crispness of the topping and the creamy texture of the cheesecake are preserved, preventing any undesirable soggy situations. Trust me, your taste buds will thank you!


Leave a Comment