
My Minecraft obsession reached a whole new level when I realized I could recreate the pixelated world in my kitchen! I’m talking about Minecraft Cookies Recipe, the most delicious way to celebrate your inner block-builder. Get ready to craft some seriously tasty treats.
These aren’t your grandma’s cookies; these are adventure-ready, pixel-perfect bites of deliciousness. Prepare for a flavor explosion that will transport you straight to the Nether!
Here are some reasons why you’ll love these Minecraft Cookies:
They’re incredibly easy to make, perfect for even the most novice baker.
The flavor is unbelievably rich and satisfying, a delightful blend of sweet and savory.
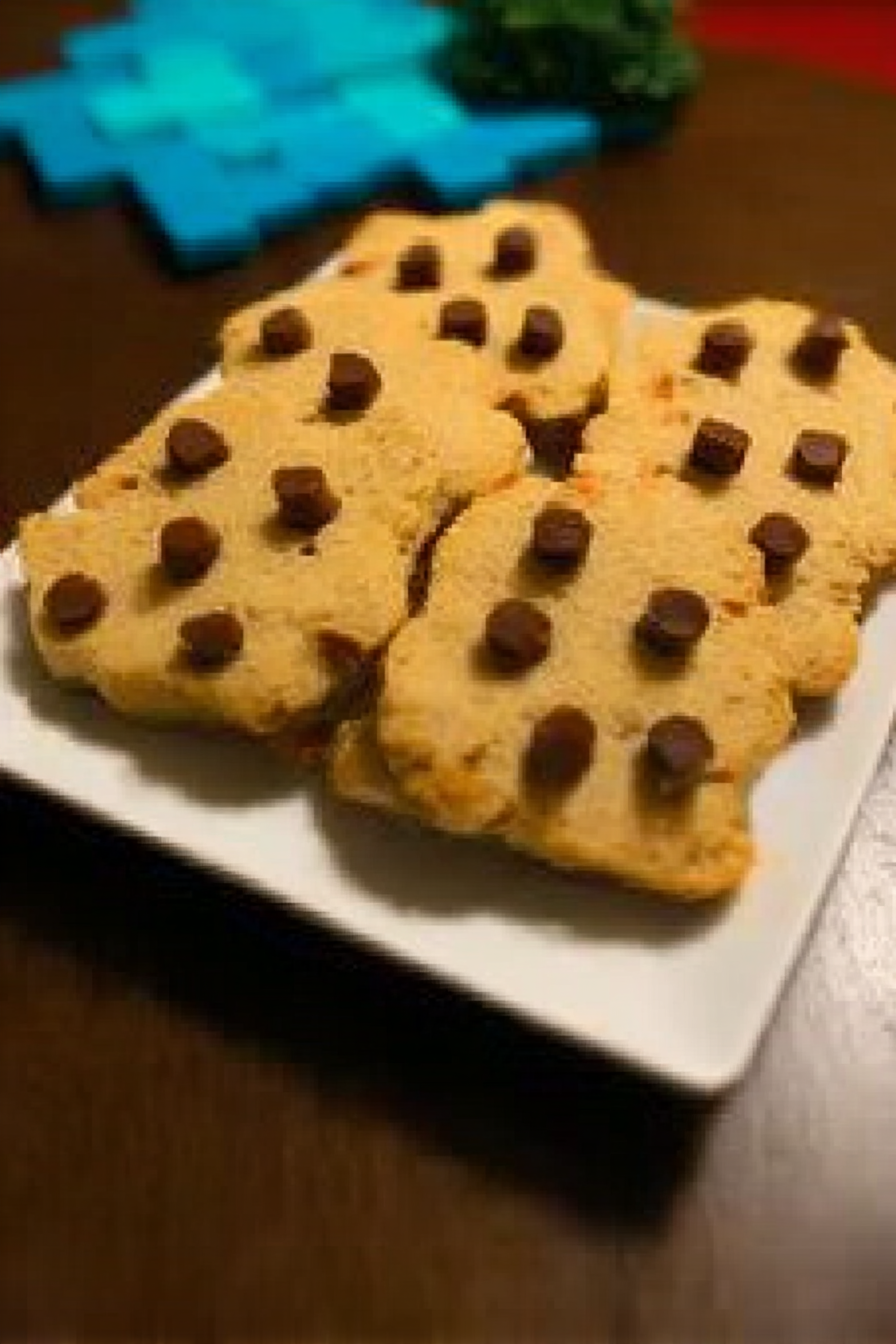
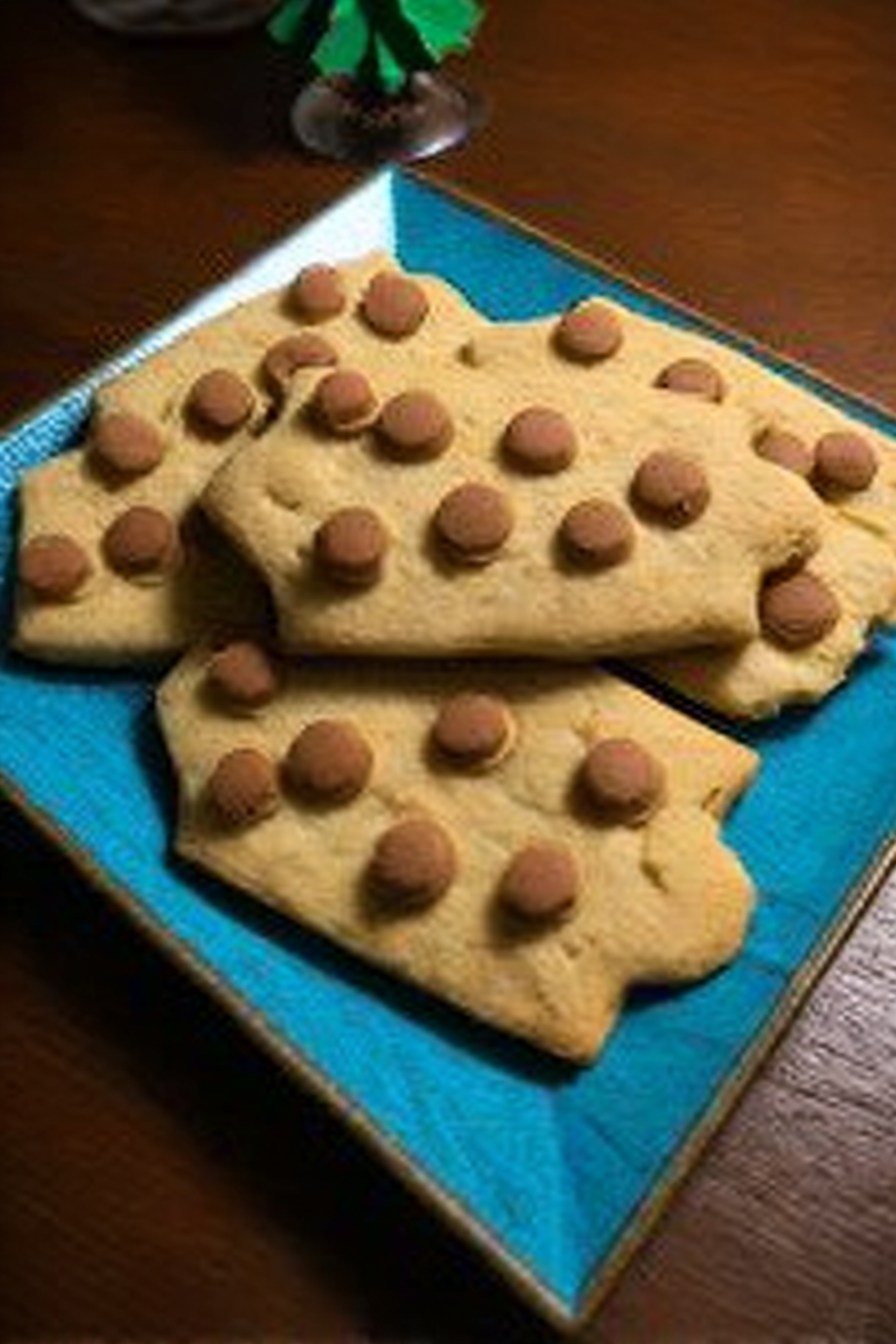
These cookies are visually stunning, resembling the iconic blocks of Minecraft.
They’re incredibly versatile; customize them to your liking with different add-ins.
Ingredients for Minecraft Cookies Recipe
Here’s what you’ll need to make this delicious dish:
The full ingredients list, including measurements, is provided in the recipe card directly below.
How to Make Minecraft Cookies Recipe
Follow these simple steps to prepare this delicious dish:
Step 1: Preparing the Dough
Preheat your oven to 375°F (190°C). Line baking sheets with parchment paper. In a large bowl, cream together the softened butter, granulated sugar, and brown sugar until light and fluffy. Beat in the eggs one at a time, then stir in the Alcohol-free alcohol-free vanilla extract.
Step 2: Combining Dry Ingredients
In a separate bowl, whisk together the flour, baking soda, and salt. Gradually add the dry ingredients to the wet ingredients, mixing until just combined. Be careful not to overmix.
Step 3: Adding Chocolate Chips
Stir in the chocolate chips. Divide the dough into three portions.
Step 4: Coloring the Dough
In separate bowls, add green, brown, and gray food coloring to each portion of the dough. Mix until evenly colored.
Step 5: Shaping and Baking
Drop rounded tablespoons of each colored dough onto the prepared baking sheets, creating a pixelated pattern. If using agar-agar, slightly increase the baking time for a firmer texture. Bake for 10-12 minutes, or until the edges are golden brown.
Step 6: Cooling and Serving
Let the cookies cool on the baking sheets for a few minutes before transferring them to a wire rack to cool completely. Once cooled, arrange them to create a Minecraft-inspired scene.
These Minecraft Cookies are best served fresh, but they’ll keep in an airtight container at room temperature for several days. Enjoy your pixelated culinary masterpiece!
Perfecting the Cooking Process
Preheat your oven to 350°F (175°C). Mix the dry ingredients first, then gently fold in the wet ingredients until just combined. Avoid overmixing, which can lead to tough cookies. Bake for 10-12 minutes, or until golden brown. Let them cool completely on a wire rack before enjoying your Minecraft Cookies Recipe.
Add Your Touch
Feel free to experiment! Swap chocolate chips for dried cranberries or chopped nuts. Add a pinch of cinnamon or nutmeg for a warm spice kick. For extra fun, use cookie cutters shaped like Minecraft blocks! You can even add sprinkles!
Storing & Reheating
Store your Minecraft Cookies Recipe in an airtight container at room temperature for up to a week. Reheating is optional but can be done gently in the microwave for a few seconds to soften them up slightly.
Prepping your ingredients before you start is key to avoiding stress and a messy kitchen!
Don’t be afraid to adjust baking time slightly based on your oven; every oven is a little bit different.
Using room-temperature butter helps create a chewier, more evenly baked cookie in your Minecraft Cookies Recipe.
I remember making these Minecraft Cookies Recipe for my niece’s birthday. Her eyes lit up when she saw the pixelated designs; it was the best compliment ever!
The Epic Minecraft Cookies Recipe Adventure
: A Block-by-Block Guide
(This section will include the full Minecraft Cookies Recipe)
This isn’t your grandma’s cookie recipe. Oh no, this is something far more… pixelated. We’re talking about Minecraft Cookies Recipe, the kind that will have you shouting “Creeper, awe man!” with delight. Forget diamonds; these cookies are the true treasure of the Nether.
Before we embark on this culinary quest, let me tell you a secret: making these cookies is easier than taming a wild wolf. I promise. You won’t need enchanted golden apples or potions of strength (unless you’re planning on eating the entire batch in one sitting).
Gathering Your Ingredients (The Mining Phase)
First, gather your ingredients. Imagine this as a thrilling treasure hunt in a Minecraft world. You’ll need:
1 cup (2 sticks) unsalted butter, softened (This is your pickaxe – it’s essential!)
¾ cup granulated sugar (Sweetness is important, even in the Minecraft world.)
¾ cup packed light brown sugar (Brown sugar adds a subtle depth of flavor.)
2 large eggs (These are your precious chickens; treat them well!)
2 teaspoons Alcohol-free alcohol-free vanilla extract (The essence of adventure!)
2 ¼ cups all-purpose flour (This is your building block, literally!)
1 teaspoon baking soda (The rising agent for your pixelated masterpieces.)
½ teaspoon salt (A pinch of realism, for those gritty moments in Minecraft.)
1 cup semi-sweet chocolate chips (Your cocoa beans, harvested with care.)
Optional: Colored sprinkles (For added Minecraft flair!)
Crafting the Perfect Cookie (The Building Phase)
Now for the real fun, the crafting! Preheat your oven to 350°F (175°C). This is like prepping your furnace for a long night of smelting.
In a large bowl, cream together the softened butter and both sugars until the mixture is light and fluffy. Think of this as mixing your cement for a strong foundation. Next, beat in the eggs one at a time, then stir in the vanilla. This is where your culinary skill shines. Don’t overmix it though.
In a separate bowl, whisk together the flour, baking soda, and salt. Imagine this as carefully measuring out the materials for your Minecraft house. Gradually add the dry ingredients to the wet ingredients, mixing until just combined. Don’t overmix; we want to preserve that delightful chewiness.
Stir in the chocolate chips (and sprinkles, if you’re feeling adventurous). This is the moment your Minecraft Cookies Recipe comes to life.
Drop rounded tablespoons of dough onto ungreased baking sheets. These are your pixel blocks, meticulously placed to create your edible masterpiece. Bake for 10-12 minutes, or until the edges are golden brown.
Cooling and Enjoying (The Celebration Phase)
Let the cookies cool on the baking sheets for a few minutes before transferring them to a wire rack to cool completely. This is crucial. Impatient cookie eaters will regret it.
Once cooled, admire your handiwork. These aren’t just cookies; they’re miniature works of art. You’ve built something amazing, something delicious, something truly… Minecrafty!
Minecraft Cookies Recipe Variations
: Expanding Your Horizons
The possibilities are endless! Here are some ideas to make these Minecraft Cookies Recipe even more epic:
Peanut Butter Cookies: Replace some of the butter with peanut butter for a nutty twist.
White Chocolate Macadamia Nut Cookies: Swap the chocolate chips for white chocolate chips and chopped macadamia nuts.
Oatmeal Raisin Cookies: Add ½ cup of rolled oats and ½ cup of raisins to the batter.
The key is experimentation. Don’t be afraid to try different flavor combinations.
Minecraft Cookies Recipe
: Frequently Asked Questions (FAQ)
Q: Can I freeze these cookies?
A: Absolutely! Freeze them in an airtight container for up to 3 months.
Q: How do I make them look more like Minecraft blocks?
A: Use square cookie cutters, or frost them with different colored icing to create a pixelated effect.
Enjoy your Minecraft Cookies Recipe adventure! May your crafting be smooth, your baking be golden, and your taste buds be utterly delighted.
Conclusion for Minecraft Cookies Recipe
Making these Minecraft Cookies is a fun and rewarding experience. Remember to preheat your oven properly for even baking, and don’t overmix the dough! The recipe is easily adaptable to your preferences, allowing you to experiment with different flavors and additions. Whether you’re a seasoned baker or a complete novice, this recipe provides a delicious and satisfying result that’s sure to please everyone. So grab your aprons, gather your ingredients, and get ready for a sweet adventure in the kitchen! Happy baking!
Print
Minecraft Cookies Recipe
Delicious minecraft cookies recipe recipe with detailed instructions and nutritional information.
- Total Time: 35 minutes
- Yield: 4 servings 1x
Ingredients
- 1 cup (2 sticks) unsalted butter, softened
- ¾ cup granulated sugar
- ¾ cup packed brown sugar
- 2 large eggs
- 2 teaspoons vanilla extract
- 2 ¼ cups all-purpose flour
- 1 teaspoon baking soda
- 1 teaspoon salt
- 2 cups chocolate chips (milk chocolate or dark chocolate, or a mix!)
Instructions
- Step 1: Preheat your oven to 375°F (190°C) and line baking sheets with parchment paper. This prevents sticking and makes cleanup easier.
- Step 2: In a large bowl, cream together the softened butter, granulated sugar, and brown sugar until light and fluffy. Use an electric mixer for best results. This incorporates air and makes the cookies light and chewy.
- Step 3: Beat in the eggs one at a time, then stir in the vanilla extract. Make sure everything is well combined.
- Step 4: In a separate bowl, whisk together the flour, baking soda, and salt. Gradually add the dry ingredients to the wet ingredients, mixing until just combined. Be careful not to overmix; a few lumps are okay.
- Step 5: Stir in the chocolate chips.
- Step 6: Drop rounded tablespoons of cookie dough onto the prepared baking sheets, leaving some space between each cookie.
- Step 7: Bake for 9-11 minutes, or until the edges are golden brown. Keep a close eye on them to prevent burning.
- Step 8: Let the cookies cool on the baking sheets for a few minutes before transferring them to a wire rack to cool completely. Enjoy your Minecraft-worthy cookies!
Notes
- Store these delicious cookies in an airtight container at room temperature for up to a week, or freeze them for longer storage.
- For a warm, gooey center, reheat individual cookies in the microwave for 10-15 seconds.
- Serve these Minecraft Cookies alongside a glass of cold milk for the ultimate gaming snack.
- To achieve extra-chewy cookies, use slightly less flour than the recipe calls for – but be careful not to make them too wet!
- Prep Time: 15 minutes
- Cook Time: 20 minutes
- Method: Stovetop
- Cuisine: American
FAQs
How long do Minecraft Cookies Recipe last?
These Minecraft Cookies, if stored properly in an airtight container at room temperature, will stay fresh and delicious for about 3-4 days. After that, they might start to lose some of their delightful crispness, but they’ll still be edible for a couple more days. However, for the best flavor and texture, aim to eat them within the first four days. Remember, we’re making Minecraft Cookies, not a historical artifact meant to last centuries!
Can I use different types of flour in this Minecraft Cookies Recipe?
Absolutely! Experimentation is key to becoming a true Minecraft Cookie master. You can swap out some of the all-purpose flour for whole wheat flour, oat flour, or even almond flour (though this will slightly alter the texture). Just be mindful that different flours absorb liquid differently, so you might need to adjust the amount of milk you add to achieve the right consistency. Don’t be afraid to get creative – baking is all about having fun!
Are these Minecraft Cookies Recipe gluten-free?
No, this particular Minecraft Cookies Recipe isn’t inherently gluten-free because it uses all-purpose flour. If you need a gluten-free version, you’ll want to substitute the all-purpose flour with a gluten-free blend. Many excellent gluten-free flour blends are available in most grocery stores. Remember to check the specific instructions on your chosen blend, as they may require slight adjustments to the recipe. Crafting delicious, allergy-friendly cookies is totally possible!
My Minecraft Cookies Recipe are too dry, what did I do wrong?
Ah, the dreaded dry cookie! This often happens if you’ve accidentally added too little liquid or baked them for too long. Next time, try adding a tablespoon or two more of milk at a time, mixing well between additions, until you reach a soft but not sticky dough. Also, keep a close eye on your cookies while they bake. They are perfectly done when the edges are golden brown and the centers are still slightly soft. Slightly underbaked is better than overly baked in this Minecraft Cookies Recipe, trust me!


Leave a Comment