
Oh, my taste buds tingle just thinking about the Black Forest Cheesecake Symphony: 7 Delightful Layers! This isn’t just dessert; it’s an experience, a decadent dance of creamy cheesecake, rich chocolate, and bursts of sweet cherry that will leave you humming a happy tune.
Picture this: a slice of this glorious creation, each layer singing a different note of deliciousness. I remember the first time I made this for a friend’s birthday. The room filled with the aroma of chocolate and everyone’s eyes widened at the sight of it. It was more than just a cake; it was a memory in the making! It’s ideal for birthdays, anniversaries, or any day that screams for a touch of extraordinary sweetness. Get ready to orchestrate your own symphony of flavors!
Here’s why you’ll adore this Black Forest Cheesecake Symphony:
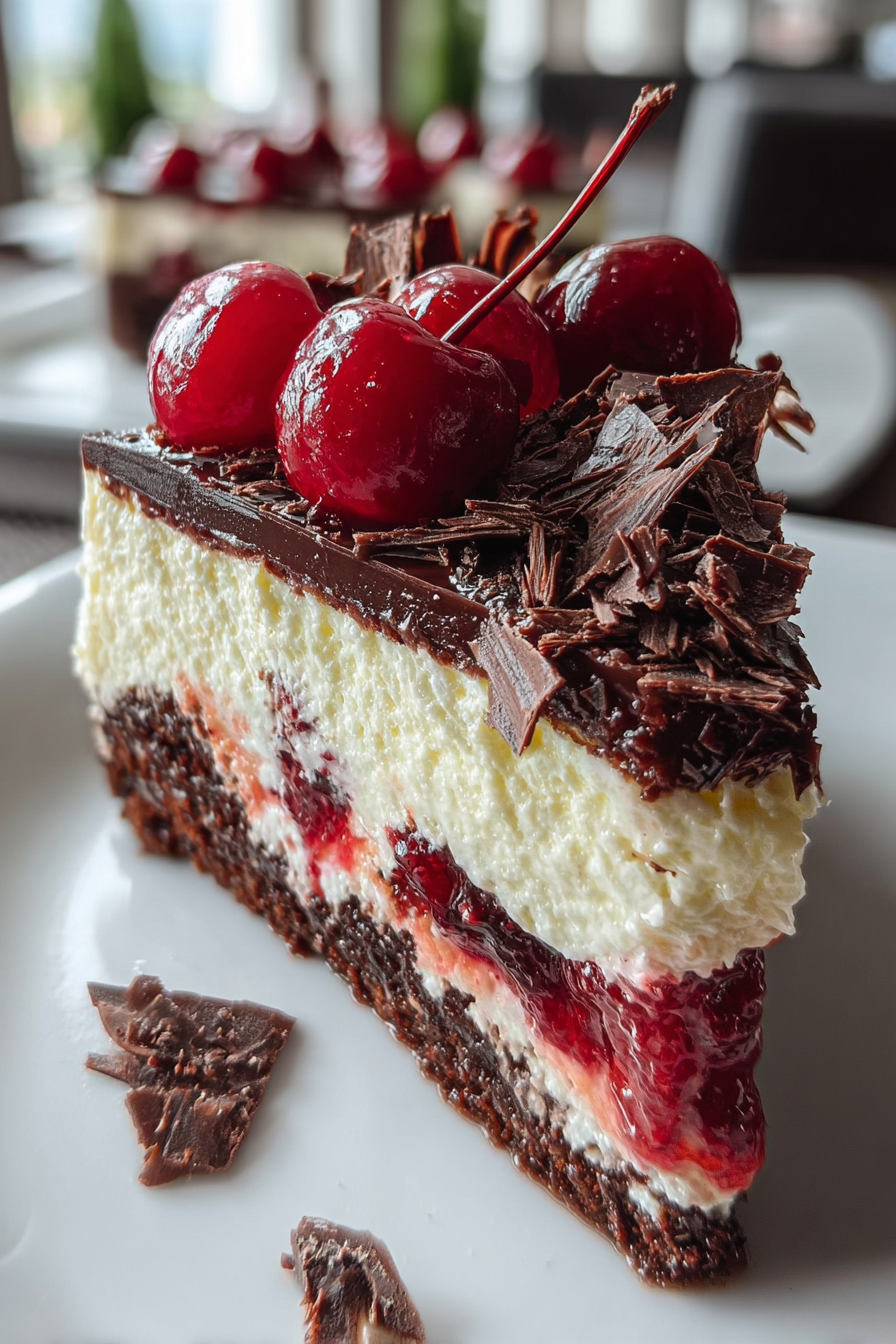
- Experience seven layers of pure joy, including a buttery crust, velvety cheesecake, and a luscious cherry topping that explode with flavor.
- Impress your friends and family with a visually stunning dessert that looks like it came straight from a fancy bakery, but is surprisingly simple to create.
- Enjoy a delightful balance of rich chocolate, creamy cheesecake, and tart cherries, making every bite an unforgettable taste adventure.
- Customize the cherry layer with your favorite variety and adjust the sweetness to perfectly suit your palate, creating a truly unique and personalized dessert.
Ingredients for Black Forest Cheesecake Symphony: 7 Delightful Layers
Here’s what you’ll need to make this delicious dish:
The full ingredients list, including measurements, is provided in the recipe card directly below.
How to Make Black Forest Cheesecake Symphony: 7 Delightful Layers
Follow these simple steps to prepare this delicious dish:
Step 1: Prepare the Chocolate Cookie Crust
Preheat oven to 350°F (175°C). In a medium bowl, combine the chocolate cookie crumbs and melted butter until well combined. Press the mixture firmly into the bottom of a 9-inch springform pan.
Step 2: Mix the Cheesecake Filling
In a large bowl, beat the softened cream cheese and granulated sugar until smooth and creamy. Add the eggs one at a time, beating well after each addition. Stir in the sour cream, Alcohol-free alcohol-free vanilla extract, and cocoa powder until evenly combined.
Step 3: Assemble and Bake the Cheesecake
Pour the cheesecake filling over the chocolate cookie crust in the springform pan. Bake for 55-65 minutes, or until the center is just slightly jiggly. Turn off the oven and let the cheesecake cool inside for 1 hour with the door ajar.
Step 4: Prepare the Cherry Topping
While the cheesecake is cooling, prepare the cherry topping. In a medium saucepan, combine the cherries, cherry juice, granulated sugar (if needed, depending on the sweetness of the cherries), and Alcohol-free alcohol-free almond extract. Bring to a simmer over medium heat.
Step 5: Thicken the Cherry Topping
In a small bowl, whisk together the cornstarch and a tablespoon of cold water to create a slurry. Pour the slurry into the simmering cherry mixture and cook, stirring constantly, until the sauce has thickened. Remove from heat and let cool slightly.
Step 6: Chill and Serve
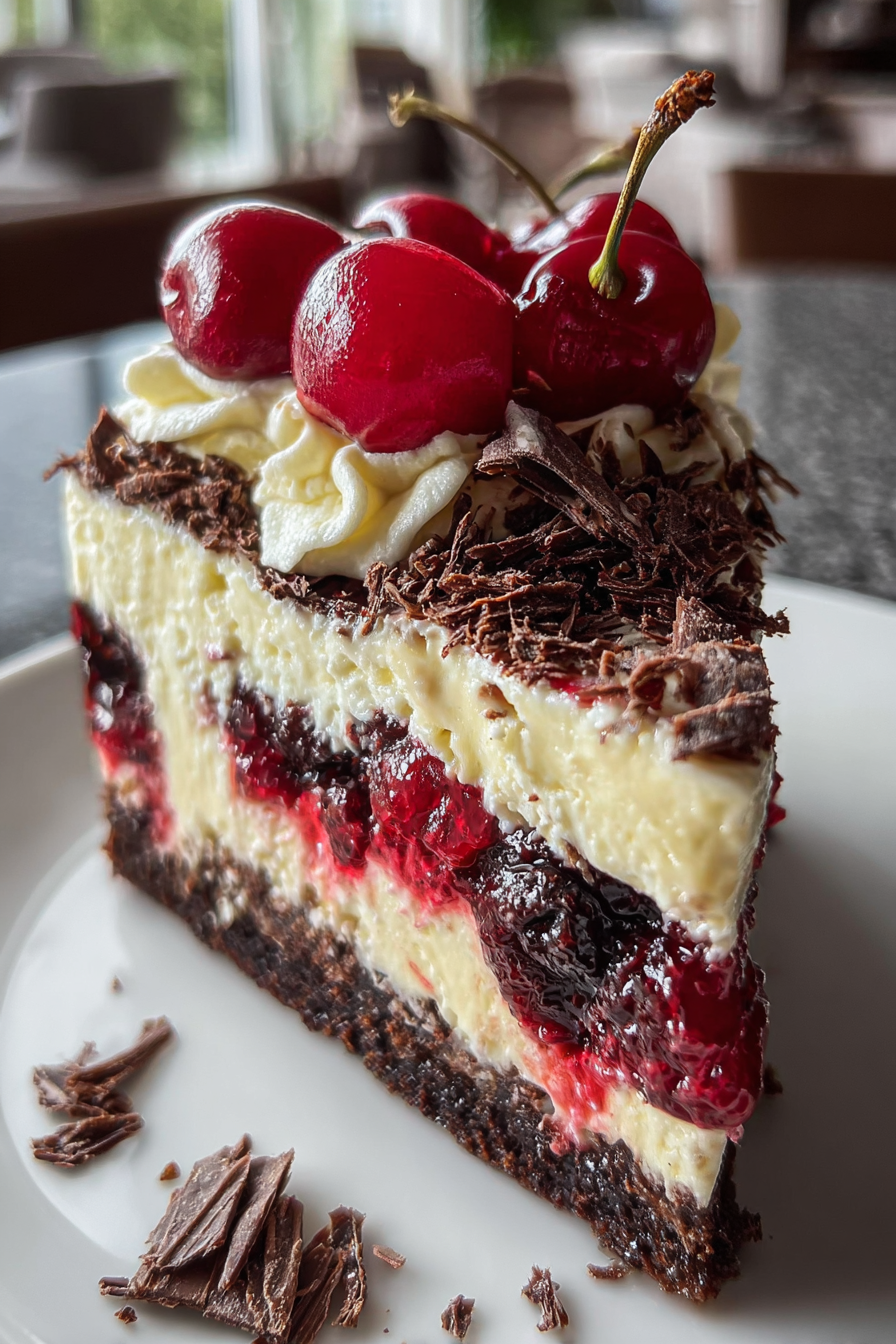
Once the cheesecake has cooled completely, remove it from the springform pan and transfer it to a serving plate. Pour the cooled cherry topping over the cheesecake. Cover and refrigerate for at least 4 hours, or preferably overnight, before serving. Transfer to plates and garnish with chocolate shavings for the perfect finishing touch.
Perfecting the Cooking Process
To ensure a seamless baking experience for this Black Forest Cheesecake Symphony: 7 Delightful Layers, begin by preparing all ingredients. Start with the base, then move to the cheesecake filling while the crust chills. Assemble each layer carefully, allowing ample chilling time between.
Add Your Touch
Feel free to experiment to make this Black Forest Cheesecake Symphony: 7 Delightful Layers your own. Try adding a hint of Alcohol-free alcohol-free almond extract to the cheesecake filling or use different berries for the topping. A sprinkle of cocoa powder on top adds an extra touch of elegance.
Storing & Reheating
Keep your decadent Black Forest Cheesecake Symphony: 7 Delightful Layers fresh by storing it in the refrigerator, covered, for up to 3-4 days. Due to its layered nature, freezing is not recommended. Serve chilled for the best flavor and texture.
Here are some helpful tips for creating your own Black Forest Cheesecake Symphony: 7 Delightful Layers:
- Ensure the cream cheese is at room temperature for a smooth, lump-free cheesecake filling, which is crucial for the overall texture.
- Resist the urge to overbake the cheesecake; a slight jiggle in the center indicates it’s perfectly done and will set as it cools.
- For clean slices, chill the cheesecake thoroughly and use a warm, damp knife between each cut, this avoids messy presentation.
(Personal anecdote formated as paragraph subheading)
My first attempt was a delicious disaster, but everyone loved the gooey mess! It taught me the importance of chilling time, now a non-negotiable step.
Diving Deep into the Black Forest Cheesecake Symphony: 7 Delightful Layers
Ah, the Black Forest Cheesecake Symphony: 7 Delightful Layers. Just saying the name makes you want to grab a spoon and dive in headfirst, doesn’t it? This isn’t just a dessert; it’s an experience. A culinary journey. A delicious excuse to abandon all responsibilities and embrace pure, unadulterated joy.
Now, I know what you’re thinking: “Seven layers? That sounds complicated!” Fear not, my friend. While it’s true this cheesecake isn’t a five-minute wonder, it’s absolutely achievable. Think of it as a project, a labor of love, a delicious masterpiece you can proudly display (and devour). And I’m here to guide you through every glorious step.
Why This Black Forest Cheesecake Symphony: 7 Delightful Layers is a Winner
So, why should you bother with seven layers when you could just slap some cherries on a regular cheesecake and call it a day? Because life is too short for ordinary cheesecake! This Black Forest Cheesecake Symphony: 7 Delightful Layers offers a symphony of textures and flavors that will tantalize your taste buds.
Imagine this: a buttery, crumbly chocolate crust. A creamy, dreamy cheesecake filling. A luscious cherry layer bursting with sweet and tart goodness. Then repeat, and repeat, and repeat again. Each layer adds depth and complexity, creating a dessert that’s both sophisticated and utterly irresistible.
Besides, who can resist a showstopper? This cheesecake is guaranteed to impress your friends, your family, and even that judgmental neighbor who always seems to find fault with your lawn decorations.
Ingredients for Your Culinary Masterpiece
Let’s gather our troops, shall we? Here’s what you’ll need to create this magnificent Black Forest Cheesecake Symphony: 7 Delightful Layers. Don’t worry, most of these are pantry staples, and the rest are easily obtainable at your local grocery store.
- **For the Chocolate Crust:** Chocolate cookies (the kind you’d use for a milkshake), melted butter, a pinch of salt.
- **For the Cheesecake Filling:** Cream cheese (full-fat, please!), sugar, eggs, Alcohol-free alcohol-free vanilla extract, a touch of sour cream for tanginess.
- **For the Cherry Layer:** Frozen cherries (pitted, of course), sugar, cornstarch (for thickening), a splash of cherry juice.
That’s it! Simple, right? Now, let’s get baking!
The Step-by-Step Guide to Black Forest Cheesecake Symphony: 7 Delightful Layers
Alright, put on your aprons and let’s dive into the heart of the matter: creating this epic cheesecake. Remember, patience is key. This isn’t a race; it’s a delicious journey.
Crafting the Chocolate Crust
First, we need to create the foundation upon which our symphony will be built: the chocolate crust.
1. Crush those chocolate cookies into fine crumbs. You can use a food processor, a rolling pin, or even a sturdy zip-top bag and a good ol’ fashioned pounding session.
2. Combine the cookie crumbs with melted butter and a pinch of salt. Mix well until everything is evenly moistened.
3. Press the mixture firmly into the bottom of a springform pan. Pro-tip: use the bottom of a measuring cup to get a nice, even crust.
4. Bake the crust for about 10 minutes at 350°F (175°C). This will help it set and prevent it from becoming soggy.
Whipping Up the Cheesecake Filling
While the crust is baking (and your kitchen is smelling divine), let’s get started on the cheesecake filling.
1. In a large bowl, beat the cream cheese and sugar until smooth and creamy. This is where that room temperature cream cheese really shines!
2. Add the eggs one at a time, beating well after each addition. Be careful not to overmix, as this can lead to cracks in the cheesecake.
3. Stir in the Alcohol-free alcohol-free vanilla extract and sour cream. Mix until just combined.
Building the Cherry Layer
Now for the star of the show: the cherry layer!
1. In a saucepan, combine the frozen cherries, sugar, and cherry juice.
2. Bring to a simmer over medium heat.
3. In a small bowl, whisk together cornstarch and a tablespoon of water to create a slurry.
4. Add the cornstarch slurry to the cherry mixture and cook, stirring constantly, until the sauce has thickened.
Assembling the Black Forest Cheesecake Symphony: 7 Delightful Layers
Here comes the fun part! It’s time to assemble our masterpiece.
1. Pour a thin layer of cheesecake filling over the baked chocolate crust.
2. Spoon a layer of cherry sauce over the cheesecake filling.
3. Repeat layers of cheesecake filling and cherry sauce until you’ve used up all the ingredients. Aim for roughly 7 layers!
4. Bake the cheesecake at 325°F (160°C) for about 60-70 minutes, or until the center is just slightly jiggly.
5. Turn off the oven and let the cheesecake cool completely inside with the door slightly ajar. This helps prevent cracking.
6. Refrigerate the cheesecake for at least 4 hours, or preferably overnight, before serving. This allows the flavors to meld and the cheesecake to set properly.
Serving Suggestions for Your Spectacular Creation
Congratulations! You’ve successfully created a Black Forest Cheesecake Symphony: 7 Delightful Layers. Now it’s time to reap the rewards of your labor.
Serve the cheesecake chilled, topped with a dollop of whipped cream and a few fresh cherries. You can also dust it with cocoa powder or drizzle it with melted chocolate for an extra touch of decadence.
This cheesecake is perfect for special occasions, dinner parties, or simply as a well-deserved treat for yourself. Enjoy every delicious bite!
Troubleshooting Your Black Forest Cheesecake Symphony: 7 Delightful Layers
Even the best bakers encounter the occasional hiccup. Here are some common cheesecake problems and how to fix them:
- **Cracked Cheesecake:** This is usually caused by overbaking or rapid temperature changes. To prevent cracks, don’t overbake the cheesecake, let it cool slowly in the oven, and avoid opening the oven door frequently during baking.
- **Soggy Crust:** Make sure to bake the crust before adding the filling. This will help it set and prevent it from becoming soggy. You can also brush the baked crust with melted chocolate to create a moisture barrier.
- **Lumpy Filling:** Ensure that the cream cheese is at room temperature before mixing. Beat the cream cheese and sugar until smooth and creamy before adding the eggs.
Don’t be discouraged by these little challenges! Baking is all about learning and experimenting.
Variations to Spice Things Up
Want to add your own personal touch to this Black Forest Cheesecake Symphony: 7 Delightful Layers? Here are a few variations to get you inspired:
- **Chocolate Cherry Swirl:** Swirl melted chocolate into the cheesecake filling before baking for a marbled effect.
- **Alcohol-free alcohol-free almond extract:** Add a teaspoon of Alcohol-free alcohol-free almond extract to the cheesecake filling for a nutty flavor.
- **Different Berries:** Use a mix of raspberries, blueberries, and strawberries instead of cherries for a colorful and fruity twist.
Get creative and have fun! The possibilities are endless.
The Grand Finale: Enjoying Your Black Forest Cheesecake Symphony: 7 Delightful Layers
There you have it: a step-by-step guide to creating a Black Forest Cheesecake Symphony: 7 Delightful Layers that will impress even the most discerning palates. Remember, baking is about more than just following a recipe; it’s about creating something special with your own two hands. So, go ahead, embrace the challenge, and create a delicious masterpiece that you can be proud of. And most importantly, enjoy every single bite!
Equipment Recommendations
To make your baking process smoother, here are some recommended tools:
- Springform pan (9-inch)
- Food processor or rolling pin
- Mixer (stand or hand)
- Measuring cups and spoons
- Saucepan
Nutritional Information (Approximate)
Please note that the nutritional information is approximate and can vary based on specific ingredients and portion sizes.
*Calories: 450 per serving
*Fat: 30g
*Sugar: 35g
*Protein: 8g
Black Forest Cheesecake Symphony: 7 Delightful Layers – A Sweet Ending
With that, we reach the end of our baking adventure. Now go forth, bake, and create your own Black Forest Cheesecake Symphony: 7 Delightful Layers!
Conclusion for Black Forest Cheesecake Symphony: 7 Delightful Layers
So there you have it! Your own magnificent Black Forest Cheesecake Symphony, a dessert worthy of standing ovations. Seven layers of pure indulgence, from the chocolatey base to the tangy cherries and creamy cheesecake. This isn’t just a dessert; it’s a showstopper, a conversation starter, and a guaranteed crowd-pleaser. Prepare to be showered with compliments and requests for the recipe. Now go forth and bake this symphony of flavors – your taste buds will thank you!
Print
Black Forest Cheesecake Symphony: 7 Delightful Layers
Delicious black forest cheesecake symphony: 7 delightful layers recipe with detailed instructions and nutritional information.
- Total Time: 35 minutes
- Yield: 4 servings
Ingredients
- Chocolate Cookies (for crust): 250g
- Unsalted Butter (melted): 100g
- Cream Cheese (softened): 750g
- Granulated Sugar: 200g
- Eggs: 3 large
- Sour Cream: 200g
- Vanilla Extract: 1 teaspoon
- Canned Cherry Pie Filling: 1 can (approx. 500g)
Instructions
- Step 1: Prepare the crust. Finely crush the chocolate cookies (using a food processor or by hand). Mix the cookie crumbs with the melted butter until well combined. Press the mixture firmly into the bottom of a 9-inch springform pan.
- Step 2: Make the cheesecake batter. In a large bowl, beat the softened cream cheese and sugar until smooth and creamy. Beat in the eggs one at a time, then stir in the sour cream and vanilla extract until just combined. Do not overmix.
- Step 3: Bake the cheesecake. Pour half of the cheesecake batter over the cookie crust. Spoon half of the cherry pie filling over the batter. Pour the remaining cheesecake batter over the cherry layer and top with the remaining cherry pie filling.
- Step 4: Bake in a preheated oven at 325°F (160°C) for 60-70 minutes, or until the edges are set and the center is slightly wobbly. Turn off the oven and let the cheesecake cool inside the oven with the door slightly ajar for 1 hour to prevent cracking.
- Step 5: Chill and serve. Remove the cheesecake from the oven and let it cool completely at room temperature. Then, cover the pan with plastic wrap and chill in the refrigerator for at least 4 hours, or preferably overnight, before serving. Release the cheesecake from the springform pan and slice to serve.
Notes
- Store leftover cheesecake tightly wrapped in the refrigerator for up to 3 days to maintain its creamy texture and prevent it from drying out.
- For an extra decadent treat, warm individual slices gently in the microwave for 15-20 seconds before serving, enhancing the cherry flavor.
- Garnish each slice with a dollop of whipped cream and a sprinkle of shaved dark chocolate for an elegant presentation.
- To avoid a cracked surface, resist the urge to overmix the cheesecake batter; gently combine ingredients until just smooth.
- Prep Time: 15 minutes
- Cook Time: 20 minutes
- Method: Stovetop
- Cuisine: American
FAQs
Can I use regular cherries instead of sour cherries in this Black Forest Cheesecake Symphony?
Well, you absolutely *could*, but prepare for a sweetness overload! Sour cherries provide that crucial tartness that perfectly balances the richness of the cheesecake and the decadent chocolate layers. Regular cherries will make it a bit too sugary, like a sugar rush at a candy factory. If you *must* use regular cherries, consider adding a touch of lemon juice to the cherry filling to mimic that sour kick. Trust me, your taste buds will thank you for the sour cherry adventure!
How do I prevent my Black Forest Cheesecake Symphony from cracking?
Ah, the dreaded cheesecake crack! It’s the culinary equivalent of a bad hair day. To avoid this, bake your symphony in a water bath. This creates a humid environment, ensuring even baking and preventing the cheesecake from drying out too quickly. Also, don’t overbake it! The cheesecake should still have a slight wobble in the center when it’s done. Finally, let it cool gradually in the oven with the door ajar. Patience, my friend, is key to a crack-free masterpiece.
What’s the best way to store leftover Black Forest Cheesecake Symphony?
If you actually *have* leftovers (a testament to incredible willpower!), store your Black Forest Cheesecake Symphony in an airtight container in the refrigerator. It will happily chill there for up to 3 days. Just be warned: the temptation to sneak a slice every time you open the fridge will be intense. You might even consider hiding it behind the broccoli. I won’t judge, we’ve all been there. You may also store the cheesecake in the freezer for up to a month.
Can I make this Black Forest Cheesecake Symphony ahead of time?
You bet! In fact, I highly recommend it. Making the Black Forest creation a day or two in advance allows the flavors to meld together beautifully, resulting in a richer, more harmonious experience. The chilling time also helps the cheesecake set properly, making it easier to slice and serve. It’s like giving the flavors a chance to have a party in your fridge before the main event. Just wrap it tightly to prevent it from absorbing any rogue fridge odors.


Leave a Comment