
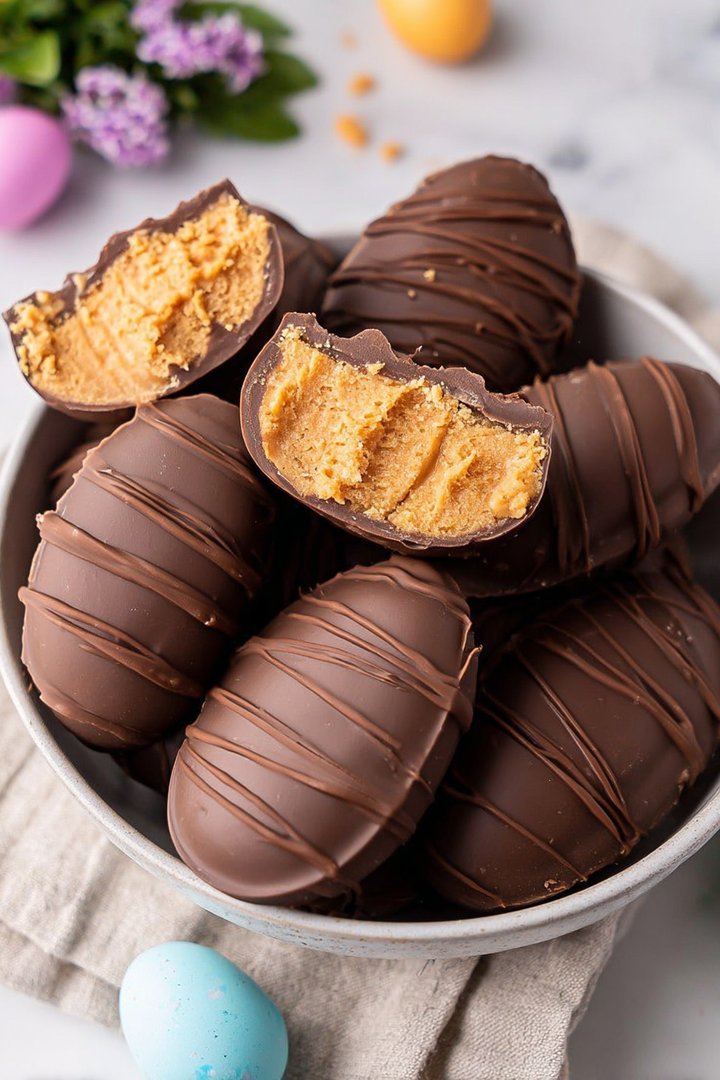
Imagine biting into a creamy, dreamy peanut butter center, encased in a crisp, snappy chocolate shell shaped like an adorable Spring celebration egg. These aren’t your average store-bought candies; these are Homemade Peanut Butter Spring celebration Eggs crafted with love (and maybe a little chocolate smeared on your face).
Get ready to ditch the pre-packaged treats and embark on a delightful adventure in your kitchen! You’ll create unbelievably delicious and surprisingly simple Homemade Peanut Butter Spring celebration Eggs that will have everyone hopping with joy.
Here’s why you’ll absolutely adore these Homemade Peanut Butter Spring celebration Eggs:
- Crafting these eggs is surprisingly simple, even for novice bakers, making them a fun and rewarding project.
- The rich, salty-sweet peanut butter filling perfectly complements the smooth, melt-in-your-mouth chocolate coating.
- These eggs offer a charming and festive visual appeal, perfect for Spring celebration baskets, dessert platters, or delightful gifts.
- Easily customize the chocolate, fillings, or decorations to suit your individual taste and dietary preferences ensuring a unique treat.
Ingredients for Homemade Peanut Butter Spring celebration Eggs
Here’s what you’ll need to make this delicious dish:
The full ingredients list, including measurements, is provided in the recipe card directly below.
How to Make Homemade Peanut Butter Spring celebration Eggs
Follow these simple steps to prepare this delicious dish:
Step 1: Prepare the Peanut Butter Filling
In a large bowl, mix together the creamy peanut butter, powdered sugar, melted butter, and Alcohol-free alcohol-free vanilla extract until well combined and smooth. The mixture should be firm enough to hold its shape.
Step 2: Shape the Eggs
Line a baking sheet with parchment paper. Using a spoon or your hands, scoop out tablespoon-sized portions of the peanut butter mixture and shape them into egg shapes. Place the shaped eggs on the prepared baking sheet.
Step 3: Chill the Eggs
Place the baking sheet in the freezer for at least 30 minutes to allow the peanut butter eggs to firm up. This will make them easier to dip in the chocolate.
Step 4: Melt the Chocolate
In a double boiler or microwave-safe bowl, melt the semi-sweet chocolate chips and coconut oil together until smooth. If using a microwave, heat in 30-second intervals, stirring in between, to prevent burning.
Step 5: Dip the Eggs
Remove the peanut butter eggs from the freezer. Using a fork or dipping tools, dip each egg into the melted chocolate, ensuring it is completely coated. Place the dipped eggs back on the parchment-lined baking sheet.
Step 6: Decorate and Set
While the chocolate is still wet, decorate the eggs with sprinkles, chopped nuts, or melted white chocolate. Place the baking sheet in the refrigerator for at least 30 minutes to allow the chocolate to set completely.
Transfer the Homemade Peanut Butter Spring celebration Eggs to a serving platter and watch them disappear faster than you can say “Happy Spring celebration!”
Perfecting the Cooking Process
For the most streamlined experience creating these delightful treats, melt your chocolate first. While it’s cooling slightly, prepare your peanut butter filling. This way, you can efficiently assemble and chill your Homemade Peanut Butter Spring celebration Eggs without delay.
Add Your Touch
Feel free to experiment with different chocolates. Dark chocolate offers a sophisticated twist, while white chocolate provides a sweeter canvas. Consider adding chopped nuts or dried fruit to the peanut butter filling for extra texture and flavor.
Storing & Reheating
Store your Homemade Peanut Butter Spring celebration Eggs in an airtight container in the refrigerator for up to a week. These are best enjoyed cold, so no reheating is required. However, letting them sit at room temperature for a few minutes before serving can soften the chocolate slightly.
Here are some helpful tips for creating the perfect Homemade Peanut Butter Spring celebration Eggs:
- Use a double boiler or microwave at 30-second intervals to melt the chocolate smoothly, avoiding burning and ensuring a glossy finish.
- For a smoother filling, use creamy peanut butter and mix it thoroughly with powdered sugar and melted butter until perfectly combined.
- Chilling the peanut butter filling before dipping makes it easier to handle and helps the chocolate adhere properly for a professional look.
(Personal anecdote formated as paragraph subheading)
I remember the first time I made these for Spring celebration. My nephew declared them “better than store-bought,” which, as any home cook knows, is the ultimate compliment!
Conclusion for Homemade Peanut Butter Spring celebration Eggs:
Making Homemade Peanut Butter Spring celebration Eggs is a rewarding experience, offering a delightful treat perfect for sharing (or not!). The combination of creamy peanut butter filling and rich chocolate shell is simply irresistible. Feel free to customize the recipe with different nut butters or chocolates to suit your taste. The most important thing is to have fun and enjoy the process of creating these delicious Spring celebration eggs. These homemade goodies will surely become a beloved tradition.
Print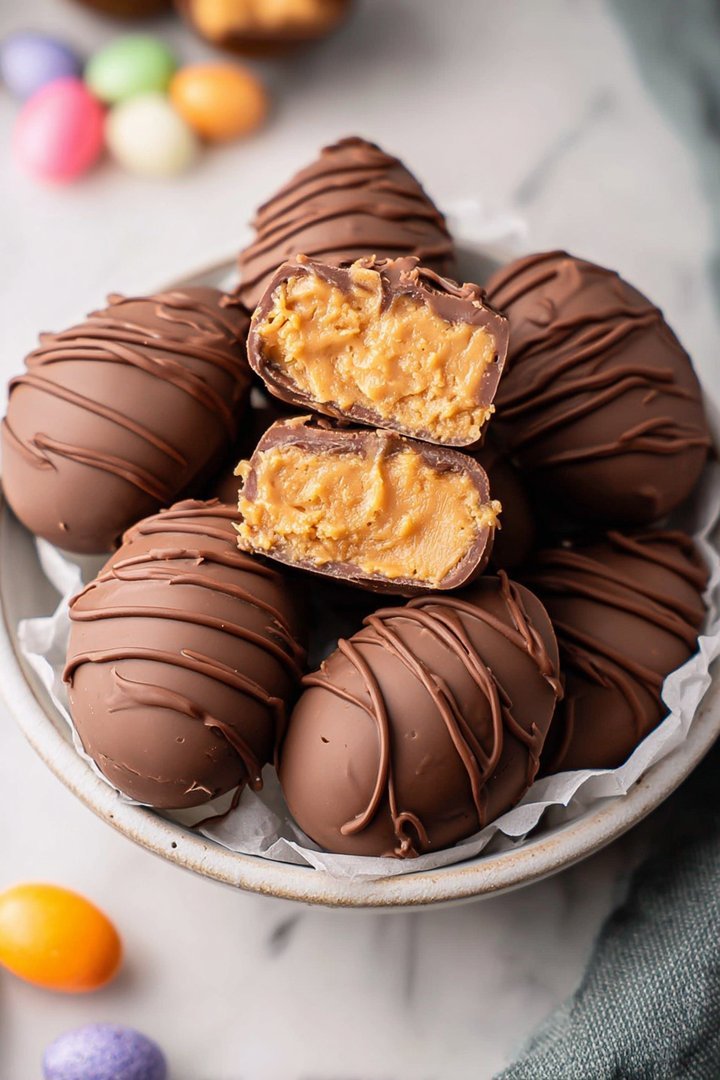
Homemade Peanut Butter Easter Eggs
Delicious homemade peanut butter easter eggs recipe with detailed instructions and nutritional information.
- Total Time: 35 minutes
- Yield: 4 servings
Ingredients
- Creamy Peanut Butter: 1 cup
- Powdered Sugar: 1 1/2 cups
- Unsalted Butter, softened: 1/4 cup (4 tablespoons)
- Vanilla Extract: 1 teaspoon
- Salt: 1/4 teaspoon
- Semi-Sweet Chocolate Chips: 12 ounces
- Vegetable Shortening: 1 tablespoon
- Sprinkles or other decorations: Optional
Instructions
- Step 1: In a large bowl, combine the peanut butter, powdered sugar, softened butter, vanilla extract, and salt. Mix until well combined and a dough-like consistency forms. You may need to add more powdered sugar if the mixture is too sticky.
- Step 2: Roll the peanut butter mixture into small egg shapes, about 1-2 inches in size. Place the formed eggs on a parchment-lined baking sheet.
- Step 3: Place the baking sheet with the peanut butter eggs into the freezer for at least 30 minutes to firm up. This will make them easier to dip in chocolate.
- Step 4: While the eggs are chilling, melt the chocolate chips and vegetable shortening in a double boiler or microwave in 30-second intervals, stirring in between, until smooth.
- Step 5: Remove the peanut butter eggs from the freezer. Dip each egg into the melted chocolate, ensuring it is fully coated. Place the dipped eggs back onto the parchment-lined baking sheet.
- Step 6: Immediately decorate with sprinkles or other desired decorations. Let the chocolate set completely before serving or storing in an airtight container in the refrigerator.
Notes
- Store leftover eggs in the refrigerator to keep them firm and prevent the chocolate from melting.
- If the chocolate coating becomes dull after refrigeration, gently warm individual eggs in your hand for a few seconds to restore the shine before serving.
- Present these delightful eggs on a festive platter alongside other Easter treats for a visually appealing and delicious spread.
- For a smoother chocolate coating, ensure your peanut butter eggs are thoroughly chilled before dipping.
- Prep Time: 15 minutes
- Cook Time: 20 minutes
- Method: Stovetop
- Cuisine: American
FAQs:
How do I get the perfect chocolate shell for my Homemade Peanut Butter Spring celebration Eggs?
Achieving that flawlessly smooth and shiny chocolate shell is easier than you think! Tempering the chocolate is key. This involves carefully heating and cooling the chocolate to stabilize its crystals. Think of it as a spa day for your cocoa! If tempering intimidates you, don’t worry. You can also use melting wafers, which are designed to set up nicely without tempering. Just melt them slowly and evenly, then dip those peanut butter goodies for a professional-looking finish that will impress everyone (especially yourself!).
Can I use a different kind of nut butter for these Homemade Peanut Butter Spring celebration Eggs?
Absolutely! While peanut butter reigns supreme in our hearts (and this recipe!), feel free to experiment with other nut butters. Almond butter offers a slightly more sophisticated flavor, while cashew butter provides a creamy, subtle sweetness. Sunflower seed butter is a great option for those with nut allergies. Just remember that different nut butters have varying consistencies, so you might need to adjust the amount of powdered sugar to achieve the perfect dough-like texture. Consider it a tasty science experiment!
What’s the best way to store my Homemade Peanut Butter Spring celebration Eggs?
Storing these delectable treats properly ensures they stay fresh and delicious for as long as possible (though, let’s be honest, they probably won’t last long!). An airtight container is your best friend. Keep the eggs in a cool, dry place, away from direct sunlight or heat. The refrigerator can also work, especially if your kitchen is warm, but be aware that the chocolate may develop a slight bloom (a harmless white coating). For optimal texture and flavor, enjoy them within a week. Good luck resisting them!
Can I make these Homemade Peanut Butter Spring celebration Eggs vegan?
Yes, you can absolutely create a vegan version of these peanut butter delights! The key swaps are simple. Substitute the butter with a plant-based butter alternative. Ensure the chocolate you use is dairy-free – many dark chocolate options are naturally vegan. Double-check the ingredient list, just in case. With these easy adjustments, everyone can enjoy the sweet, nutty goodness of homemade Spring celebration eggs, regardless of their dietary preferences. Get ready for some plant-powered Spring celebration fun!


Leave a Comment